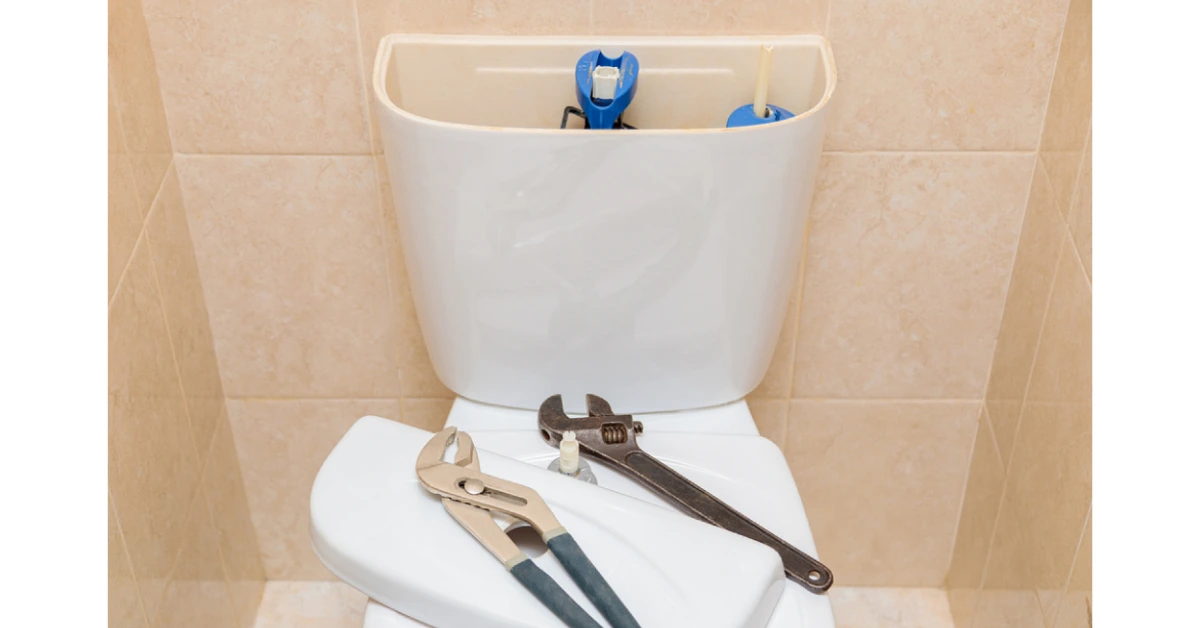
A constantly running toilet or a mysterious puddle on the bathroom floor points to a common household problem: a leaking flush tank. This issue, while seemingly minor, is a significant source of water wastage and can lead to surprisingly high utility bills. A well-functioning flush tank is crucial for maintaining hygiene and conserving water. Leaks often happen due to the simple wear and tear of internal parts. Ignoring the need for a flush tank leakage repair can result in wasted water, higher bills, and even long-term damage to your bathroom floor and ceiling below.
Flush Tank Leakage Repair and Costs in India
Below is a table based on current service provider rates, giving you a transparent look at what to expect when calling a professional.
| Professional Service | Description | Estimated Starting Cost (₹) |
|---|---|---|
| Flush Tank Leakage Repair | For common leaks, including flush button or internal mechanism repair and replacement. | ₹99 |
| Flush Tank Replacement | Complete removal of an old tank and installation of a new one (PVC or ceramic). | ₹498 |
| Waste Pipe Repair/Replacement | Fixing leaks from the pipe that carries wastewater away from the toilet. | ₹99 |
| Concealed Cistern Repair | Accessing and fixing leaks within a hidden, in-wall flush tank. | Service starts at ₹99; final cost depends on parts. |
| Pipeline Leakage Repair | Repairing a leak in the main water supply pipe connecting to the toilet tank. | ₹145 |
| Toilet Pot Blockage Removal | Clearing blockages within the toilet pot, which can sometimes be mistaken for a leak. | ₹1,251 |
| Booking a Plumber (Inspection) | A standard visit fee for a plumber to diagnose the problem. This is usually adjusted in the final bill. | ₹99 |
Common Causes of Flush Tank Leakage
Understanding why your commode’s flush tank is overflowing is the first step. Most issues stem from the natural wear of simple rubber and plastic components inside the tank.
Unbeatable Price 5-Star Rated Partner! 2200+ Shades! Top Quality Paint Free Cancellation!

Get a rental agreement with doorstep delivery

Find the BEST deals and get unbelievable DISCOUNTS directly from builders!

5-Star rated painters, premium paints and services at the BEST PRICES!
- Worn-Out Flapper or Seal: The flapper is a rubber seal that lifts when you flush. Over time, it can warp, crack, or get brittle, failing to create a watertight seal.
- Faulty Fill Valve: The fill valve (or ballcock) is the mechanism that refills the tank after a flush. If its seals wear out, it can leak or fail to shut off completely.
- Incorrect Water Level: If the float on the fill valve is set too high, the water level will rise above the overflow pipe, causing a constant, silent leak into the bowl.
- Deteriorated Tank-to-Bowl Gasket: A large rubber or sponge gasket seals the connection between the tank and the bowl. This can degrade over time, causing a significant leak when you flush.
- Loose or Worn Tank Bolts: The bolts holding the tank to the bowl have rubber washers that can perish or crack, allowing water to drip onto the floor.
- Cracked Overflow Pipe: The overflow pipe in the centre of the tank can develop cracks, allowing water to seep out and into the bowl.
- Degraded Washers: Small rubber washers are used on various connections, such as the water supply line and mounting bolts. These can become hard and crack over time.
- High Water Pressure: Excessively high water pressure in your home’s plumbing can put stress on the fill valve, causing it to fail prematurely.
- Mineral Buildup: In areas with hard water, mineral deposits can build up on the flapper or the flush valve seat, preventing a proper seal.
- Cracked Porcelain Tank: While less common, a physical impact can cause a hairline crack in the tank itself, leading to a slow but steady leak.
Tools & Materials Needed for Repair
Before starting your flush tank leakage DIY project, gather all the necessary tools and materials. Having everything on hand makes the process smoother and prevents multiple trips to the hardware store.
- Adjustable Wrench: For tightening and loosening the nuts on water supply lines and mounting bolts.
- Groove-Joint Pliers: Provides a better grip on larger nuts, like the ones holding the fill valve.
- Screwdriver (Flathead and Phillips): Needed for some types of mounting bolts and valve adjustments.
- Old Towels and a Bucket: Essential for managing water spills and keeping the area dry.
- Sponge: To soak up the last bit of water from the bottom of the tank.
- Stiff Brush or Scouring Pad: For cleaning mineral deposits from the valve seats and tank interior.
- Replacement Parts: This could be a new flapper, fill valve, toilet tank leak repair kit, or washers.
- Plumber’s Putty or Silicone Sealant: May be needed for certain types of cracks, but use with caution.
- Utility Knife: For cutting old gaskets or trimming new ones if necessary.
Step-by-Step: How to Repair a Leaking Flush Tank?
Here is a detailed guide to help you with the flush tank leak repair. We have broken it down into fixes for internal leaks (water leaking into the bowl) and external leaks (water leaking onto the floor).
For Internal Leaks (Water Leaking into the Bowl)
- Step 1: Turn Off Water: Shut the valve behind the toilet to stop water flow.
- Step 2: Empty the Tank: Flush the toilet and soak up leftover water with a sponge.
- Step 3: Check the Flapper: Look for cracks, warping, or mineral deposits.
- Step 4: Clean the Valve Seat: Gently scrub the area where the flapper seals.
- Step 5: Replace the Flapper: Install a new flapper if the old one is worn or damaged.
- Step 6: Adjust the Chain: Ensure it has just a little slack for proper flapper movement.
- Step 7: Inspect the Fill Valve: Check if water is trickling after the tank fills.
- Step 8: Replace the Fill Valve Seal: Remove the cap and swap the inner rubber seal.
- Step 9: Change the Entire Fill Valve: If leaking continues, replace the whole unit.
- Step 10: Turn Water On and Test:Slowly refill the tank and observe for any leaks.
For External Leaks (Water Leaking onto the Floor)
- Step 1: Identify the Source: Dry the tank and watch where the leak begins—top, bottom, or side.
- Step 2: Check the Supply Line: Tighten the nut at the base where the water line connects to the tank.
- Step 3: Replace the Supply Line: If still leaking, replace the water line—it may have a damaged washer or crack.
- Step 4: Inspect Tank Bolts: Check the bolts under the tank. Tighten them gently if water drips from there.
- Step 5: Drain and Disconnect: Turn off the water, empty the tank, and disconnect the supply line.
- Step 6: Remove the Tank: Unscrew the bolts underneath and lift the tank off the bowl.
- Step 7: Replace Bolts and Washers: Swap old bolts and rubber washers with new ones. Make sure seals are inside the tank.
- Step 8: Replace the Spud Washer: Change the large rubber washer between the tank and bowl for a better seal.
- Step 9: Reinstall the Tank: Place the tank back, align bolts, and hand-tighten the nuts evenly.
- Step 10: Final Tightening and Test: Tighten with a wrench, reconnect the water, and check for any leaks.
Maintenance Tips to Avoid Flush Tank Leaks
A little preventative maintenance can save you the hassle of a future flush tank leakage repair and help you avoid the high leaking toilet tank repair.
- Regularly Inspect for Leaks: Once every few months, put a few drops of food colouring in the tank. If the colour appears in the bowl without flushing, you have a leak.
- Clean the Tank Annually: Clean the inside of the tank with a soft brush to remove any sediment or mineral buildup that could damage the seals.
- Avoid Using In-Tank Cleaners: Chemical tablets can corrode the plastic and rubber parts inside your tank, leading to premature failure and leaks.
- Check Water Pressure: If you suspect high water pressure in your home, consider having a plumber install a pressure-reducing valve for your main supply line.
- Replace Worn Parts Proactively: Rubber parts like flappers and washers are inexpensive. Consider replacing them every 4-5 years, even before they start to leak.
- Do Not Overtighten Connections: When making repairs, tighten nuts just enough to create a seal. Overtightening can crack the porcelain or strip the threads.
Recommended Products for Flush Tank Repair
When undertaking a toilet tank leak repair, using the right products can make a significant difference.
- All-in-One Repair Kits: These kits often include a new fill valve, flush valve, flapper, and all necessary hardware, providing a complete overhaul of the tank’s interior.
- Heavy-Duty Flappers: Look for flappers made from chlorine-resistant materials, as they last much longer, especially in city water.
- Flexible Water Supply Lines: Braided steel water supply lines are more durable and less prone to kinking or cracking than older plastic or copper ones.
- Replacement Washer Kits: You can buy assorted packs of rubber washers, which are handy for various plumbing repairs around the house.
When to Call a Professional Plumber
While many a flush tank leaking solution can be a DIY task, some situations require an expert. If you are dealing with a concealed flush tank leakage repair, if the tank itself is cracked, or if you are simply not comfortable with the repair process, it is best to call a professional. NoBroker offers reliable plumbing services to handle these complex jobs. Our experienced plumbers can diagnose the problem accurately and ensure the repair is done correctly, saving you time and preventing further damage.
Frequently Asked Questions
Ans: First, identify the source. For leaks into the bowl, replace the flapper or flush valve seal. For leaks onto the floor, tighten or replace the tank bolts or the supply line connection.
Ans: The most common cause is a worn-out flapper or a faulty fill valve. Over time, these rubber and plastic parts degrade, failing to create a proper seal and allowing water to leak continuously.
Ans: Small hairline cracks can sometimes be sealed with waterproof epoxy or silicone as a temporary fix. However, for safety and long-term reliability, replacing the entire tank or toilet is the recommended solution.
Ans: The flush tank leakage repair cost can range from ₹300 for a simple DIY part replacement to ₹3,000 or more if you need to hire a plumber for a complex issue like a concealed tank repair.
Ans: Silicone can be used externally to seal a hairline crack as a temporary measure. However, it should not be used on internal moving parts like the flapper or valve seals, as it will prevent them from working correctly.
Loved what you read? Share it with others!
 Manasvi-Bachhav,Author
Manasvi is a partner at The Architecture Company in Mumbai, where she works with clients every day to find suitable solutions for their customised needs. Her journey into interior and product design started in 2016 with a commission to design an exhibition area while she was in the US and she has not looked back since. She believes that the key is to choose materials and research new techniques every day to blend seamlessly and create a unique experience with each project. According to her design is all about defining the problem, before you find a solution.
Source link


